The Ultimate Guide to Crispy and Flavorful Onion Rings
Introduction
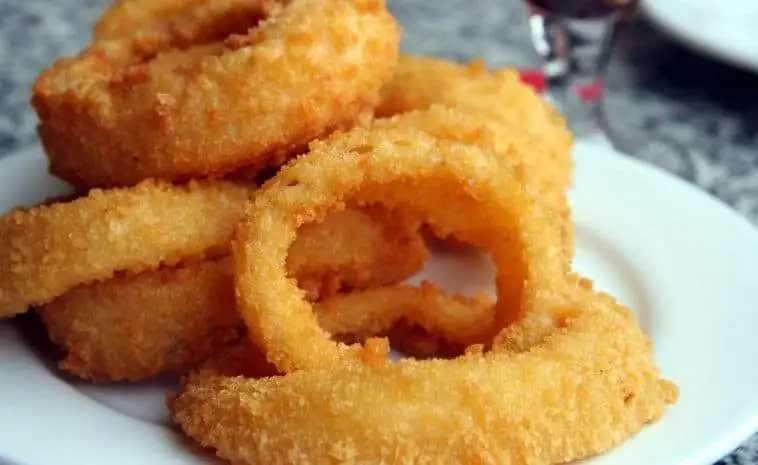
Indulge in the irresistible crunch and savory goodness of homemade Onion Rings with our comprehensive guide. This iconic snack, loved by many, is a delightful combination of sweet, tender onions and a crispy, golden-brown coating. In this in-depth article, we’ll explore the art of crafting the perfect Onion Rings, diving into the nuances of ingredients, techniques, and seasoning. Whether you’re a seasoned home cook or a novice in the kitchen, join us on a culinary journey that promises to elevate your onion ring game.
Chapter 1: Ingredients Spotlight
1.1 Yellow Onions
Choose large, sweet yellow onions for their mild flavor and satisfying bite. The size of the onion rings will depend on the thickness of the slices.
1.2 All-Purpose Flour
All-purpose flour forms the base of the batter, providing a light and crispy coating for the onion rings.
1.3 Cornstarch
Cornstarch is a secret ingredient for achieving an extra crispy texture. It helps create a delicate and airy coating.
1.4 Baking Powder
Baking powder adds a leavening effect to the batter, resulting in onion rings that are light and puffy when fried.
1.5 Sparkling Water
Using sparkling water in the batter creates bubbles, contributing to the airy and crispy texture. The carbonation adds a unique lightness.
1.6 Egg
Eggs act as a binding agent in the batter, helping it adhere to the onions and creating a cohesive coating.
1.7 Paprika
Paprika adds a subtle smokiness and a hint of color to the batter. Choose sweet or smoked paprika based on your flavor preference.
1.8 Garlic Powder
Garlic powder enhances the savory profile of the batter, infusing the onion rings with a gentle garlic aroma.
1.9 Salt and Pepper
Season to taste with salt and pepper. These basic seasonings bring out the natural flavors of the onions and add depth to the batter.
1.10 Buttermilk (Optional)
For an extra layer of flavor and tenderness, consider marinating the onion rings in buttermilk before coating them in the batter.
1.11 Vegetable Oil
Vegetable oil is ideal for frying due to its high smoke point. Choose a neutral-flavored oil to let the taste of the onion rings shine.
Chapter 2: Preparing the Onions
2.1 Onion Ring Thickness
Slice the onions into rings of your preferred thickness. Thicker slices result in heartier onion rings, while thinner slices offer a more delicate bite.
2.2 Onion Separation
Separate the onion slices into individual rings, ensuring that they are free from excess moisture. This step promotes better batter adherence.
2.3 Buttermilk Soak (Optional)
For added tenderness and flavor, soak the onion rings in buttermilk for at least 30 minutes before coating them in the batter. This step is optional but highly recommended.
Chapter 3: Creating the Batter
3.1 Dry Ingredients Mix
In a mixing bowl, combine the all-purpose flour, cornstarch, baking powder, paprika, garlic powder, salt, and pepper. Whisk the dry ingredients together until well incorporated.
3.2 Incorporating Sparkling Water
Gradually pour sparkling water into the dry ingredients, whisking continuously to avoid lumps. Continue until a smooth and slightly thick batter forms.
3.3 Egg Addition
Add the egg to the batter and whisk until it is fully incorporated. The egg contributes to the binding and structure of the batter.
3.4 Resting Period
Allow the batter to rest for 15-20 minutes. This resting period lets the ingredients meld and ensures a light and airy coating.
Chapter 4: Frying Perfection
4.1 Heating the Oil
Fill a deep fryer or a heavy-bottomed pan with vegetable oil. Heat the oil to a temperature of 350-375°F (175-190°C). Use a thermometer for precision.
4.2 Batter Application
Dip each onion ring into the batter, ensuring it is fully coated. Allow excess batter to drip off before carefully placing the ring into the hot oil.
4.3 Fry in Batches
Avoid overcrowding the fryer or pan. Fry the onion rings in batches to maintain the optimal temperature and achieve even cooking.
4.4 Golden-Brown Perfection
Fry the onion rings until they are golden brown and crisp, typically 2-3 minutes per side. Use a slotted spoon or tongs to turn them for even cooking.
4.5 Draining Excess Oil
Place the fried onion rings on a paper towel-lined plate or a wire rack to drain any excess oil. This step ensures a lighter and less greasy texture.
Chapter 5: Seasoning Sensation
5.1 Immediate Seasoning
While the onion rings are still hot, season them with a pinch of salt and pepper. This allows the seasoning to adhere to the surface for maximum flavor.
5.2 Custom Seasoning Blends
Get creative with your seasoning. Consider options like a smoky chipotle powder, cayenne for heat, or a sprinkle of grated Parmesan for added richness.
5.3 Fresh Herb Garnish
For a burst of freshness, garnish the onion rings with chopped parsley, chives, or green onions. The vibrant green adds visual appeal and a herbal note.
Chapter 6: Serving Suggestions
6.1 Classic Dipping Sauces
Serve the onion rings with classic dipping sauces like ketchup, mayonnaise, or a tangy aioli. These sauces complement the crispy exterior and savory interior.
6.2 Gourmet Sauce Pairings
Experiment with gourmet sauce pairings such as truffle aioli, Sriracha mayo, or a zesty honey mustard. Elevate the dining experience with unique and flavorful combinations.
6.3 Side Dish Harmony
Pair the onion rings with favorite side dishes like sweet potato fries, coleslaw, or a refreshing side salad. Create a balanced and satisfying meal.
Chapter 7: Onion Ring Variations
7.1 Beer-Battered Onion Rings
For a twist on the classic, consider a beer batter. Replace the sparkling water with your favorite beer for a distinctive flavor and a lighter texture.
7.2 Seasoned Bread Crumb Coating
Experiment with a seasoned bread crumb coating for a different texture. Mix breadcrumbs with herbs and spices for a crunchy and flavorful alternative.
7.3 Gluten-Free Options
Explore gluten-free alternatives by using a combination of rice flour and cornstarch in the batter. This accommodates dietary preferences without compromising on taste.
Chapter 8: Healthier Onion Ring Options
8.1 Baked Onion Rings
For a healthier alternative, bake the onion rings instead of frying. Coat them with a light mist of cooking spray and bake until golden brown for a crispy finish.
8.2 Air-Fried Onion Rings
Utilize an air fryer for a low-oil cooking method. Air-fried onion rings retain the crunch without the need for deep frying, making them a healthier option.
8.3 Veggie Twist
Incorporate a veggie twist by using zucchini or sweet potato slices. The same batter and frying techniques can be applied for a unique and colorful variation.
Chapter 9: Tips for Culinary Success
9.1 Consistent Onion Thickness
Ensure consistent onion thickness for even cooking. This step guarantees that all rings achieve the desired tenderness without being undercooked or overly crispy.
9.2 Temperature Control
Maintain proper oil temperature throughout the frying process. Fluctuations can affect the texture of the batter and the overall crispiness of the onion rings.
9.3 Serving Immediately
Enjoy the onion rings immediately after frying for the ultimate crispiness. If needed, keep them warm in a low oven until ready to serve.
Chapter 10: Conclusion
In conclusion, mastering the art of Onion Rings involves a careful balance of ingredients, technique, and creativity. From selecting the perfect onions to achieving the ideal batter consistency and exploring variations, each step contributes to the creation of a crispy and flavorful snack.
So, whether you’re hosting a game night, preparing a casual meal, or simply craving a crunchy treat, these Onion Rings are sure to satisfy. Dive into the world of homemade goodness, experiment with different flavors, and savor the joy of creating a classic snack with a personalized touch.
Bon appétit!